Restoring a Musical Mechanism
Doing any work on a music box mechanism for the first time is nerve racking, not to mention dangerous, especially if you've not thought it out beforehand. So here are some Tips and Tricks to help any newbie restorers.
Please note that the photos below are of several different movements and are for illustration purposes only.
Please also note that this page is 'work in progress' I will add further detail and images as they come to hand.
Restoration of the box will be treated separately later in the year.
At the bottom of this page you will find a list of useful tools, aids and materials for cleaning and polishing.
Restoring the box itself will be covered on a separate page coming soon.
Contents
Dismantling, cleaning and rebuilding a Cartel
Dismantling
Dismantling, cleaning and rebuilding a Cartel
Dismantling
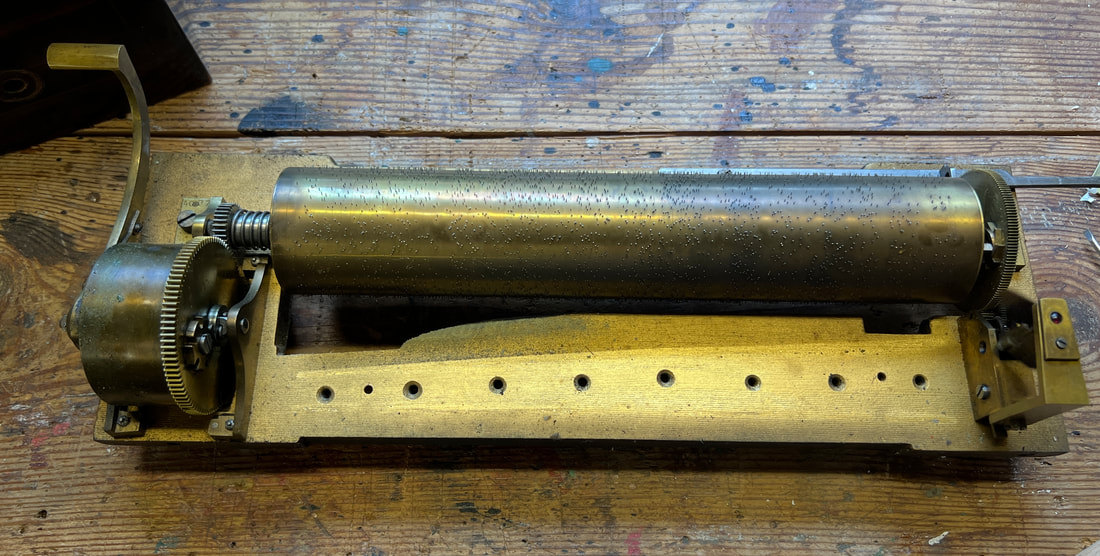
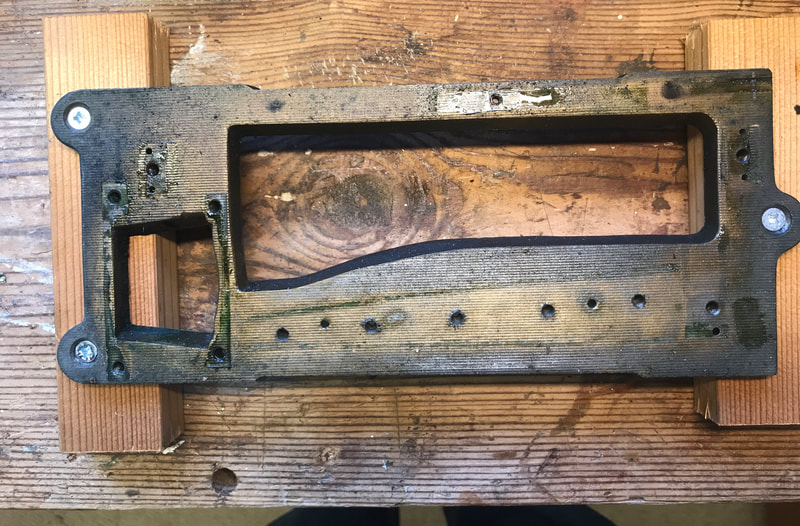
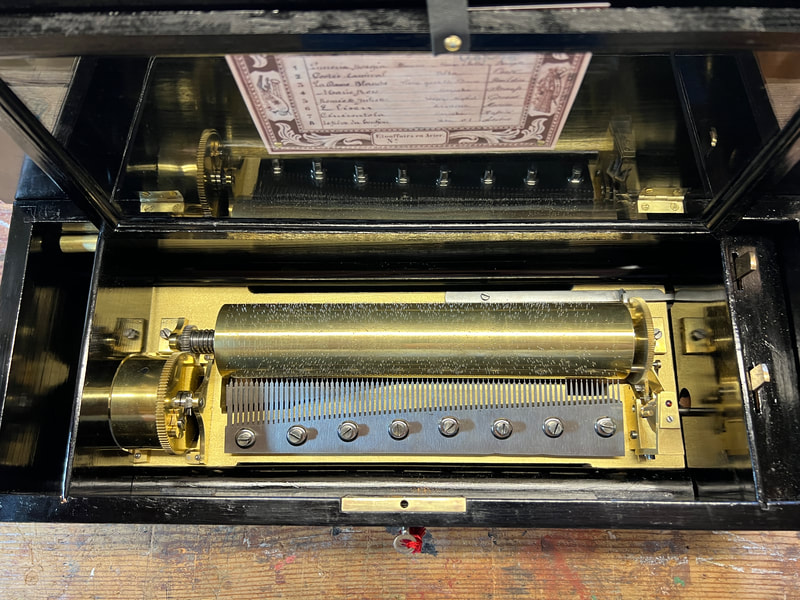
Below are photos of a movement in need of cleaning & repair and the same movement after cleaning & polishing.
As described below, I have removed the comb before undoing any other screws.
As described below, I have removed the comb before undoing any other screws.
Dismantling, cleaning and rebuilding a Cartel
The process of restoration varies from box to box. I'm usually working on several projects at the same time as there is often soaking time or drying time and sometimes waiting for materials time.
Dismantling
Have several plastic trays handy. The ones from the Indian or Chinese take-aways are perfect.
Remove the mechanism from the box and set it on a sturdy bench surface. It's a good idea to take photos of the mechanism before, during and after you work on it.
First Separation
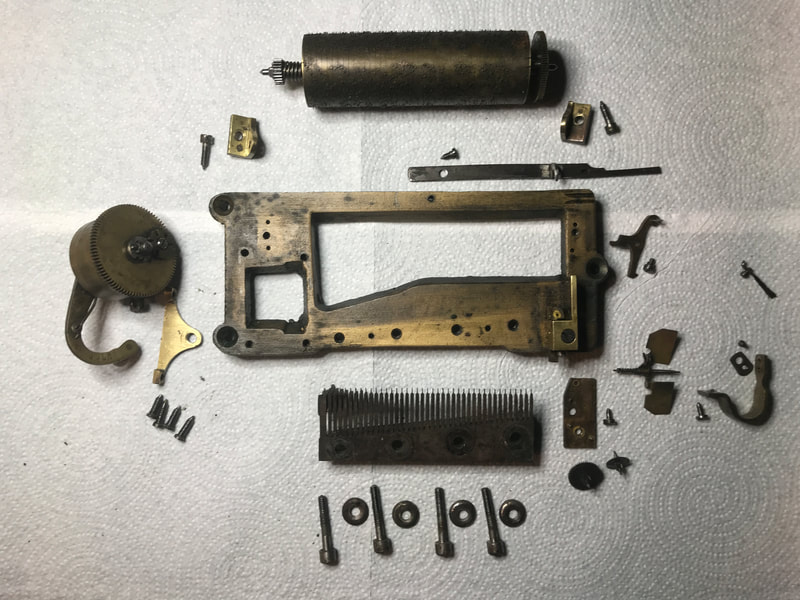
There are five main components to separate.
Make sure that the governor cannot rotate. Wedge it with a piece of folded card if necessary, then undo the screws holding the comb one by one using the right size screwdriver so as not to burr the screw heads. Sometimes the screws are marked so that they go back in order, If they are, make note of the order, though it is possible that they may have been removed and replaced in the wrong order.
There is usually a small cut out in the body of the comb base just above the bedplate so that you can insert a small screwdriver to prise the comb upwards. Be careful not to let it touch the cylinder and scratch it or damage the fingers.
Now make 100% certain that the spring is completely unwound by releasing the governor stop lever and letting it run until it stops. If it is reluctant to go, put some pressure on the great wheel and spring cog to push it along.
Once you are certain the the spring tension is nil (the Geneva Stop - if intact - will engage and the cylinder will feel 'loose') you can start to remove the governor and the spring motor.
Undo the screw holding the Governor in place. Sometimes this is done from underneath, sometimes from the top. Gently remove the whole assembly and put it into a tray.
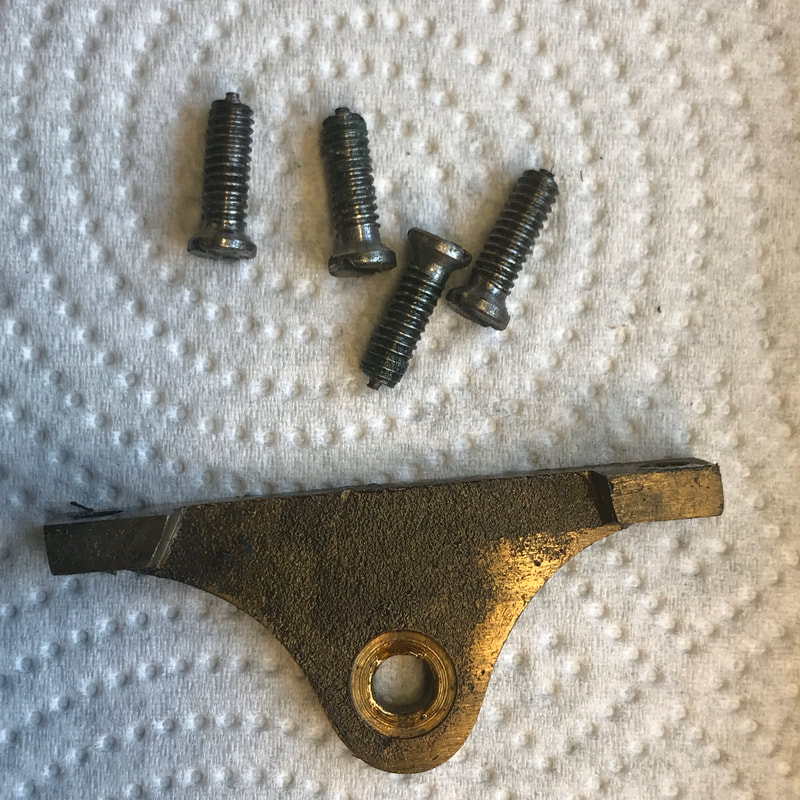
Now undo the four screws to the spring motor bearings. Lift the whole assembly out and put it in another tray. One of the bearings will probably slip off.
Finally, remove the cylinder bearing screws. The cylinder will be heavy and care must be taken not to bend any pins, so have a safe place prepared on which to lay it.
Dismantling
Have several plastic trays handy. The ones from the Indian or Chinese take-aways are perfect.
Remove the mechanism from the box and set it on a sturdy bench surface. It's a good idea to take photos of the mechanism before, during and after you work on it.
First Separation
There are five main components to separate.
- Comb
- Governor
- Spring Motor
- Cylinder
- Bedplate
Make sure that the governor cannot rotate. Wedge it with a piece of folded card if necessary, then undo the screws holding the comb one by one using the right size screwdriver so as not to burr the screw heads. Sometimes the screws are marked so that they go back in order, If they are, make note of the order, though it is possible that they may have been removed and replaced in the wrong order.
There is usually a small cut out in the body of the comb base just above the bedplate so that you can insert a small screwdriver to prise the comb upwards. Be careful not to let it touch the cylinder and scratch it or damage the fingers.
Now make 100% certain that the spring is completely unwound by releasing the governor stop lever and letting it run until it stops. If it is reluctant to go, put some pressure on the great wheel and spring cog to push it along.
Once you are certain the the spring tension is nil (the Geneva Stop - if intact - will engage and the cylinder will feel 'loose') you can start to remove the governor and the spring motor.
Undo the screw holding the Governor in place. Sometimes this is done from underneath, sometimes from the top. Gently remove the whole assembly and put it into a tray.
Now undo the four screws to the spring motor bearings. Lift the whole assembly out and put it in another tray. One of the bearings will probably slip off.
Finally, remove the cylinder bearing screws. The cylinder will be heavy and care must be taken not to bend any pins, so have a safe place prepared on which to lay it.
As you carry out the next stages of dismantling, pay close attention to, and identify ,all areas of damage or concern, particularly gear teeth.
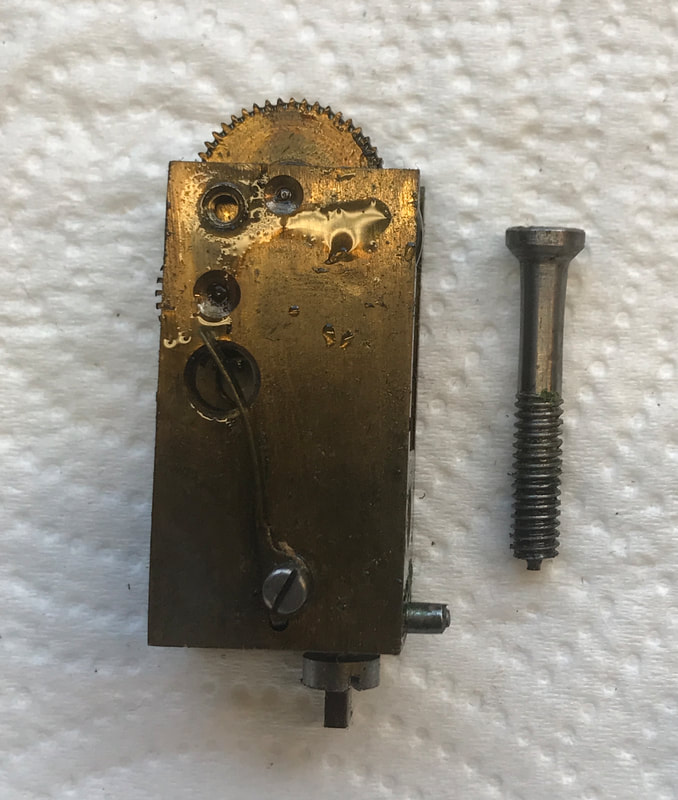
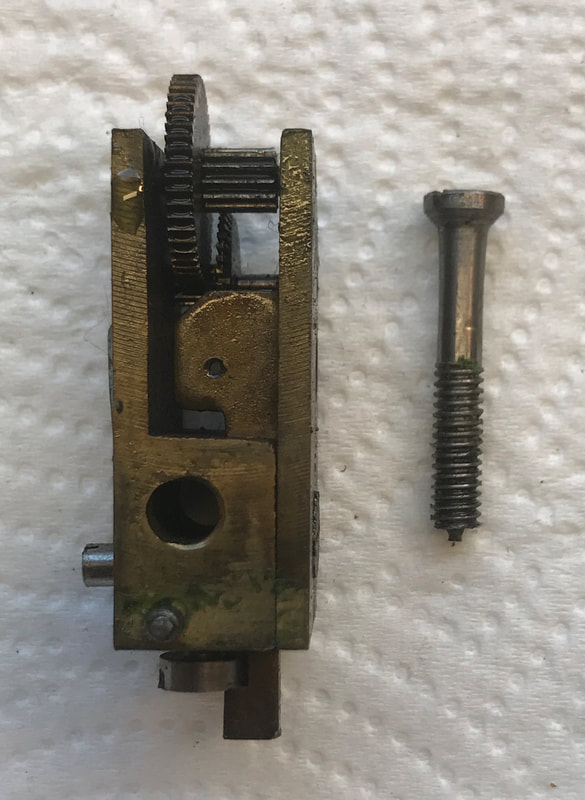
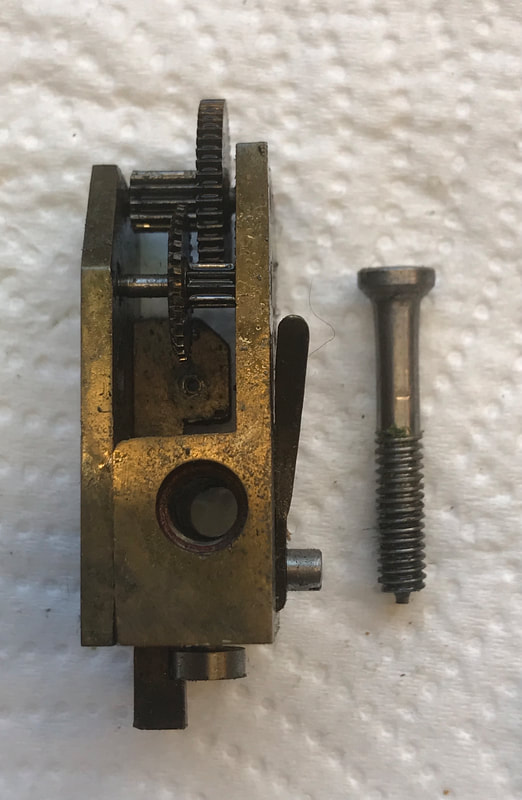
The Governor Assembly
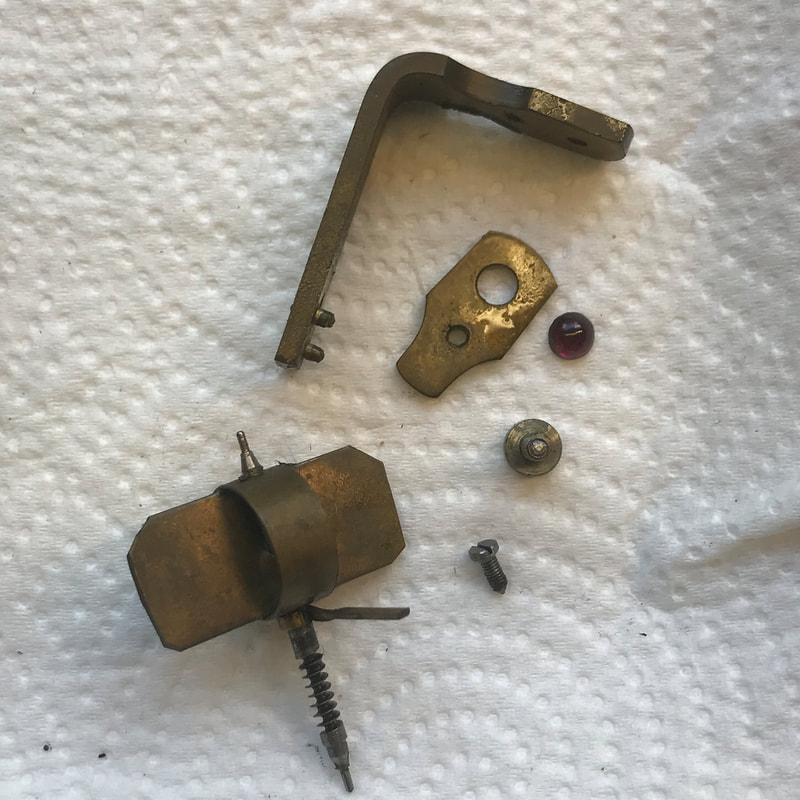
Take the Governor and remove the stop lever and it's spring. Then unscrew the governor bracket and gently remove it and the air vane. Remove the top bearing retaining plate and jewel from the bracket. sometimes the jewel is missing, but they can be replaced. Unscrew the side plate and remove the two gears.
ON NO ACCOUNT should you remove the Bottom bearing or its screw. Leave them alone as they are finely set there should be no need to adjust them. Put all the pieces in the tray, having taken note of which screw came from where. Take photos.
The Spring Motor Assembly
The spring itself is the most dangerous part of the mechanism and needs to be handled with great care to avoid accident or injury.
DO NOT unscrew the female Geneva Stop or attempt to remove the male Geneva Stop at this stage.
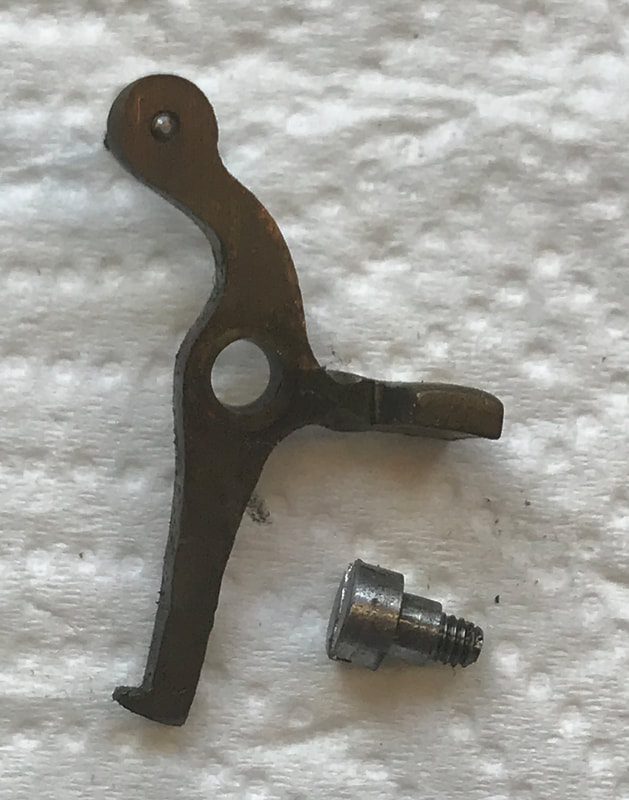
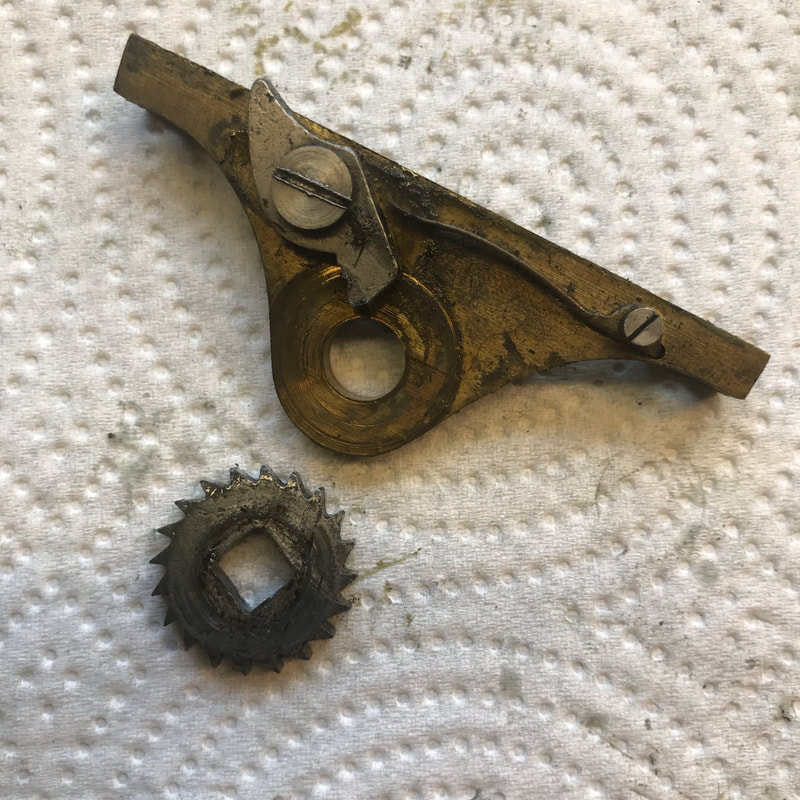
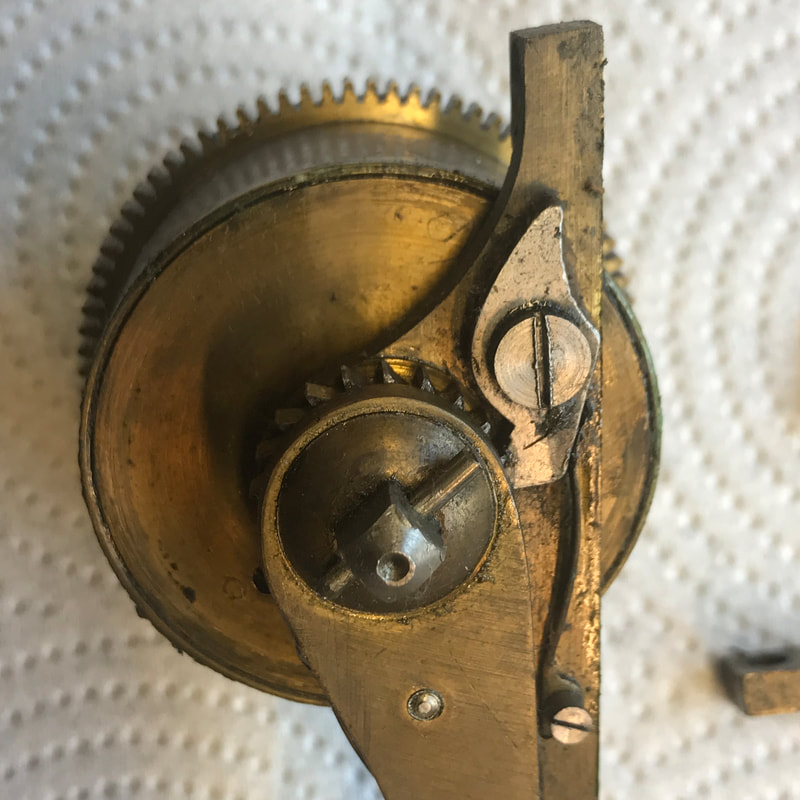
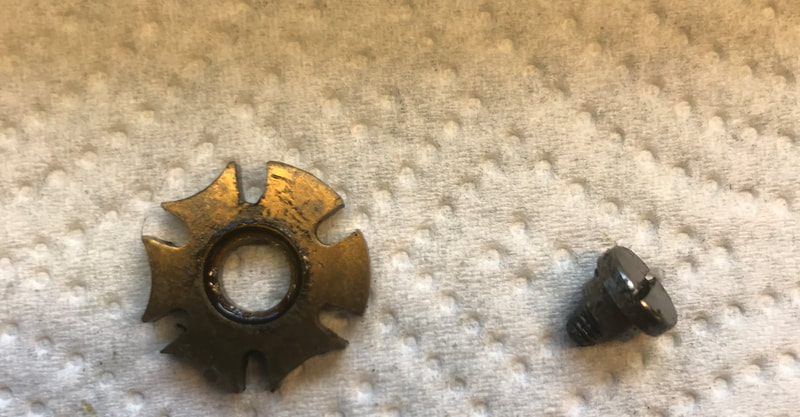
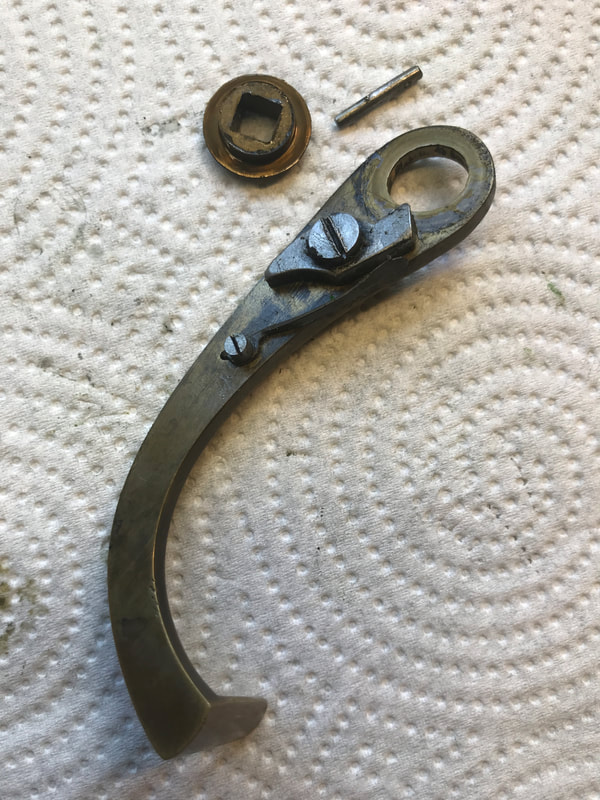
Remove the tapered pin from the winder end of the arbor and prise the lever and arbor ratchet off the shaft. Then remove the bearing. Remove the pawls and springs from the lever and bearing, making note of the screws and position of the pawls. Take photos.
You should now have the spring barrel left to dismantle.
Set the barrel in a soft jawed vice (wood jaws are best) so that you can use the winder lever to take up the spring tension while unscrewing the female Geneva Stop. NOTE: when you have removed this the lever may need to rotate more than one full turn before the spring is completely unwound so take care and take not of how many turns there are so that you can put the same number in when you reassemble the Geneva Stop. Wear stout leather gloves.
Remove the tapered pin to release the male Geneva Stop from the end of the arbor.
To remove the spring barrel cover, place a suitable screwdriver into the small cut out and gently lever it off. If it's stubborn, support the barrel by its edges using wood (the bench vice will be fine for this) with the cover pointing down. With a piece of wood resting on the end of the arbor, tap the wood directly above the arbor firmly and the cover will pop off.
Removing and cleaning the spring
As previously mentioned, the spring is a dangerous component and should be treated with respect.
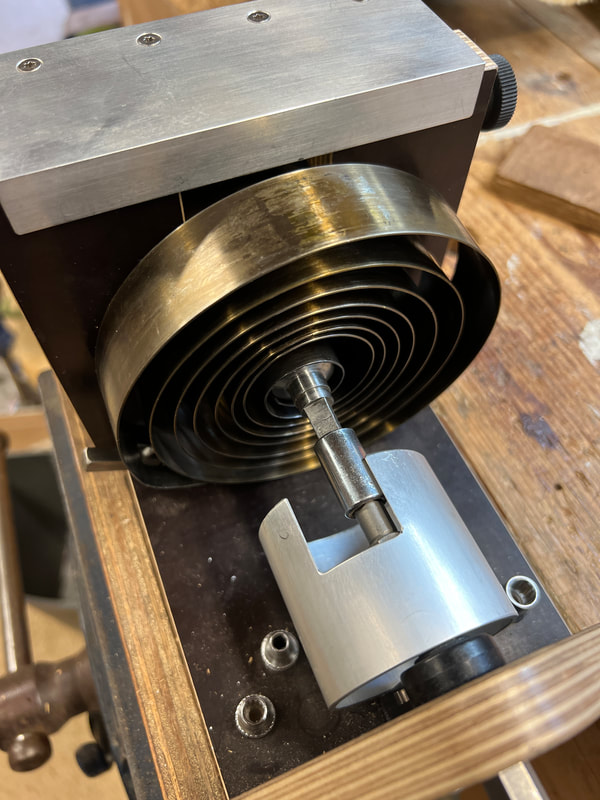
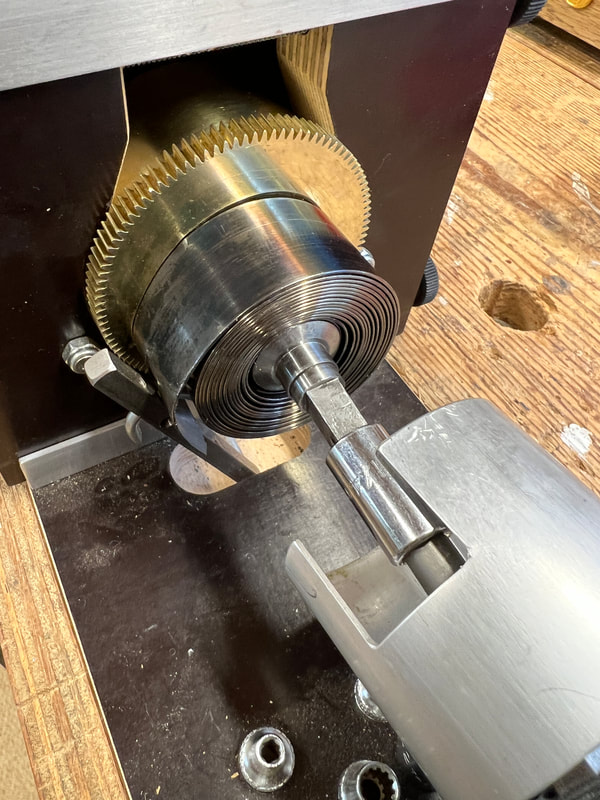
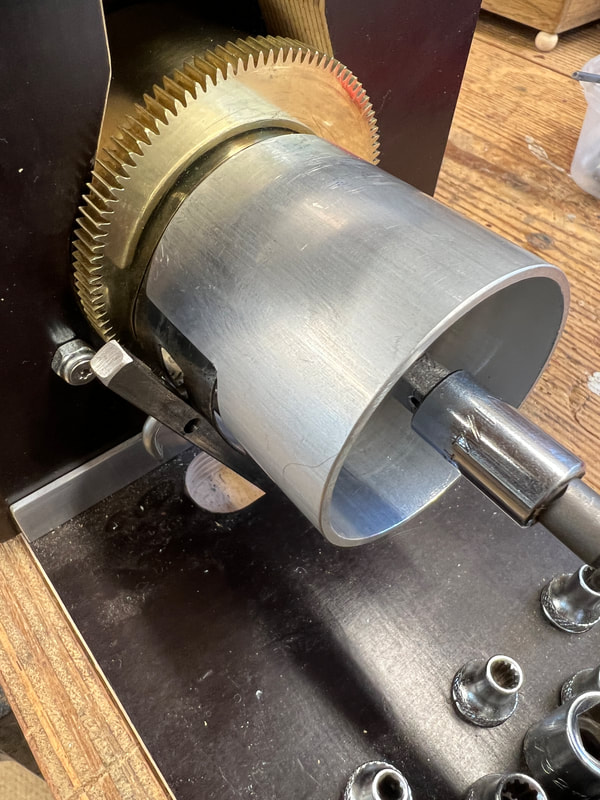
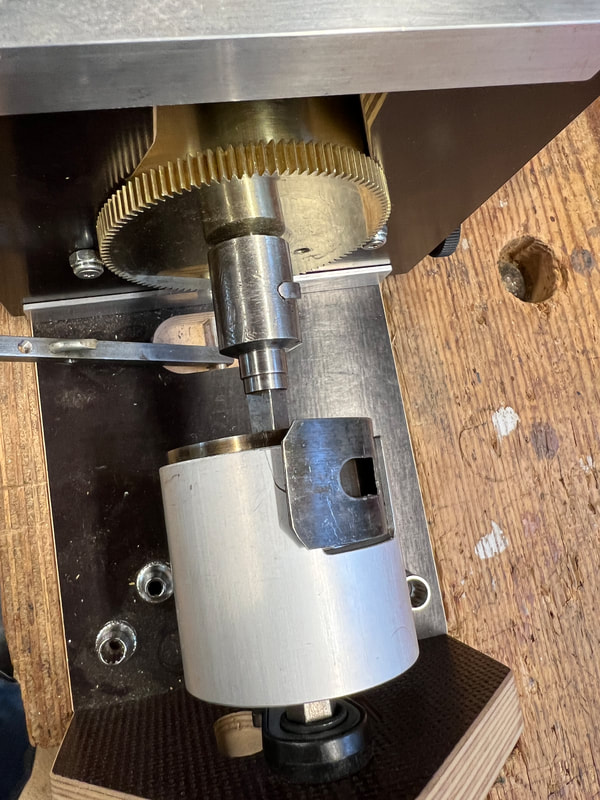
I use a purpose made jig for removing and replacing springs, but even that doesn't work in all cases. (See further down for Plan B)
The jig was purchased via Bay but unfortunately no longer available it seems.
If the spring is relatively clean, use paper towel or cotton cloth to wipe any remaining oil and grease off all surfaces.
If it is caked in oil and grease, use WD40 degreaser before wiping it clean. Set it aside in a tray.
If it is caked in oil and grease, use WD40 degreaser before wiping it clean. Set it aside in a tray.
The jig doesn't work in all cases, particularly if the spring is broken. In which case you have to report to Plan B (see below)
Warning: Wear leather gloves, and apron and eye protection.
Remove the arbor by rotating it anti-clockwise until it disengages from the spring and you can remove it.
Secure the spring casing in the bench vice.
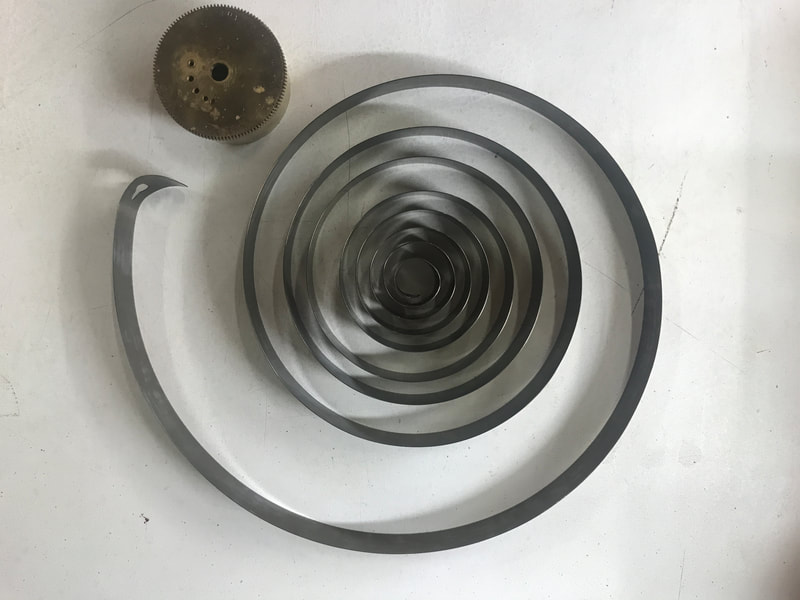
Using a pair of fine nose pliers, grip the inner end of the spring and gently draw it up until it overlaps the remaining coil. Using both gloved hands, gently pull more of the spring out while allowing it to unwind. Beware that it may suddenly release energy, so don't be distracted. When the whole spring has uncurled, unhook the end from the spring hook inside the casing.
If the spring is relatively clean, use paper towel or cotton cloth to wipe any remaining oil and grease off all surfaces.
If it is caked in oil and grease, use WD40 degreaser before wiping it clean. Set it aside in a tray.
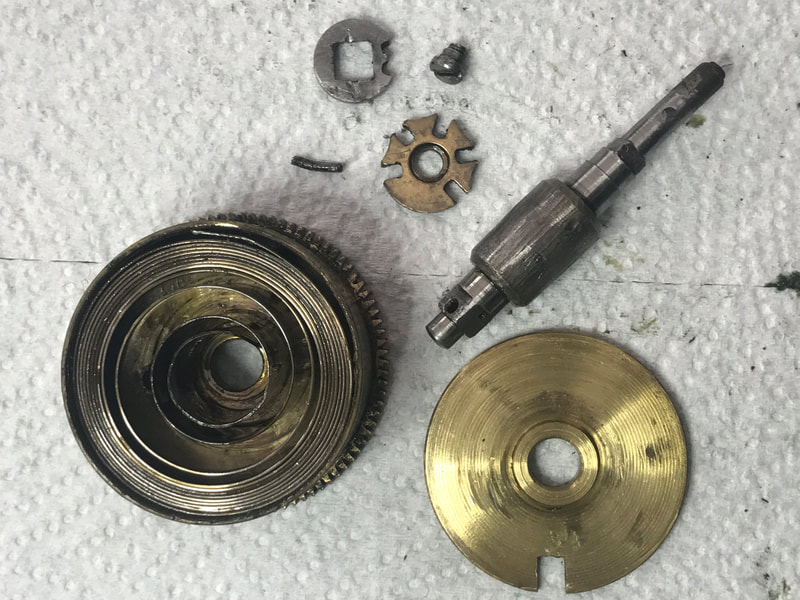
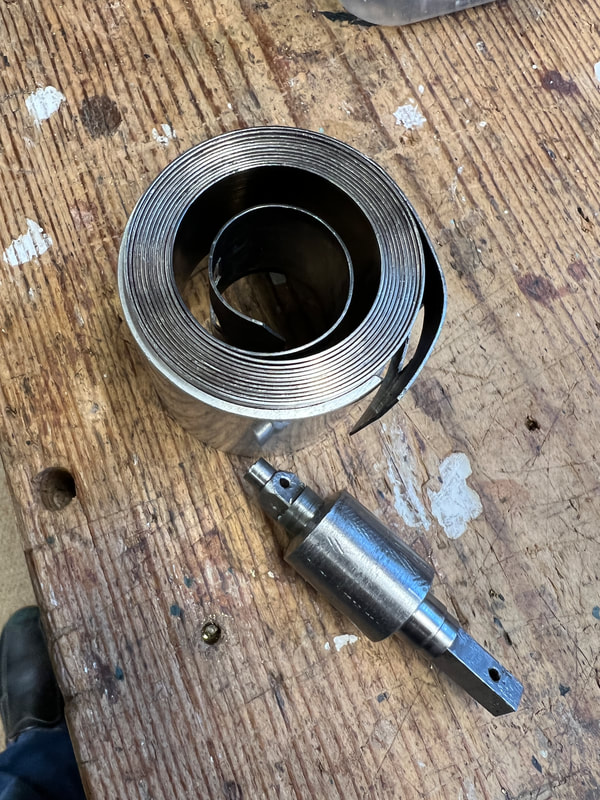
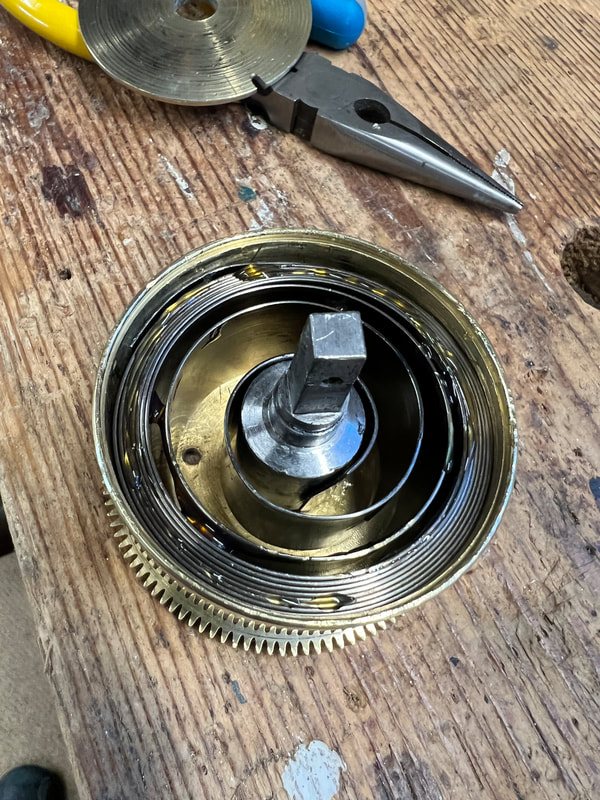
Above: The parts of the spring motor before cleaning.
See further below for replacing the spring into the casing using a specialist jig.
See further below for replacing the spring into the casing using a specialist jig.
The Cylinder Assembly
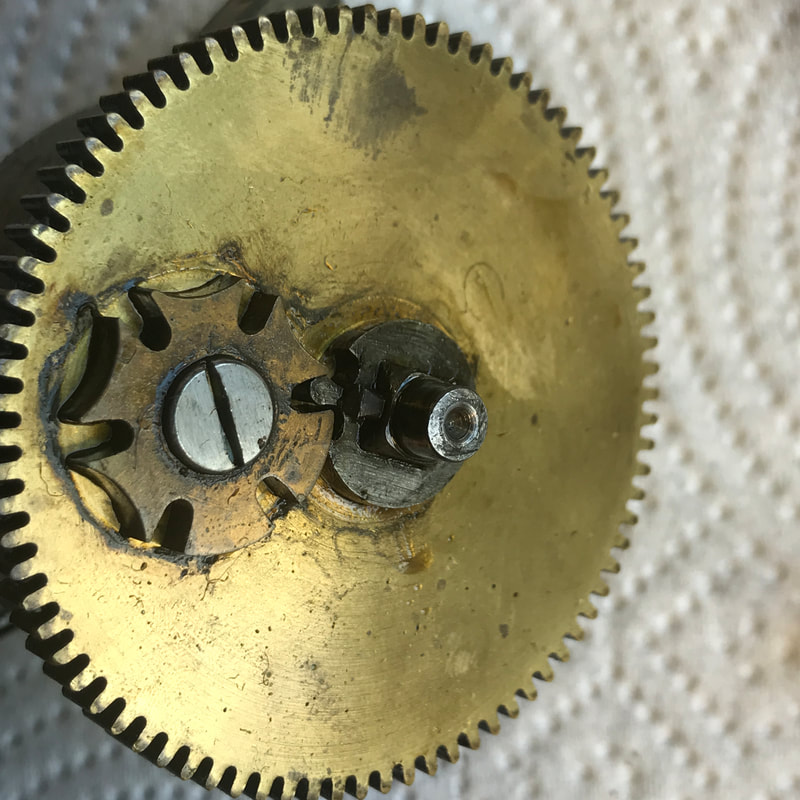
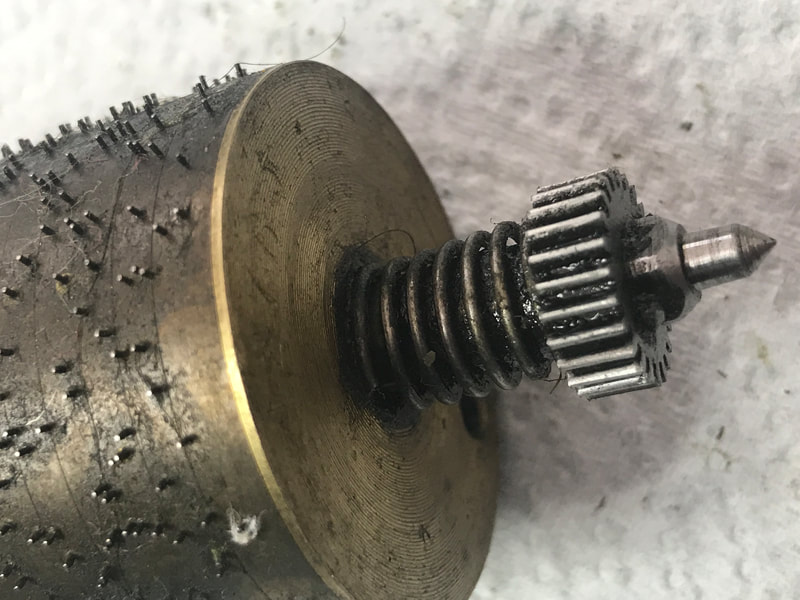
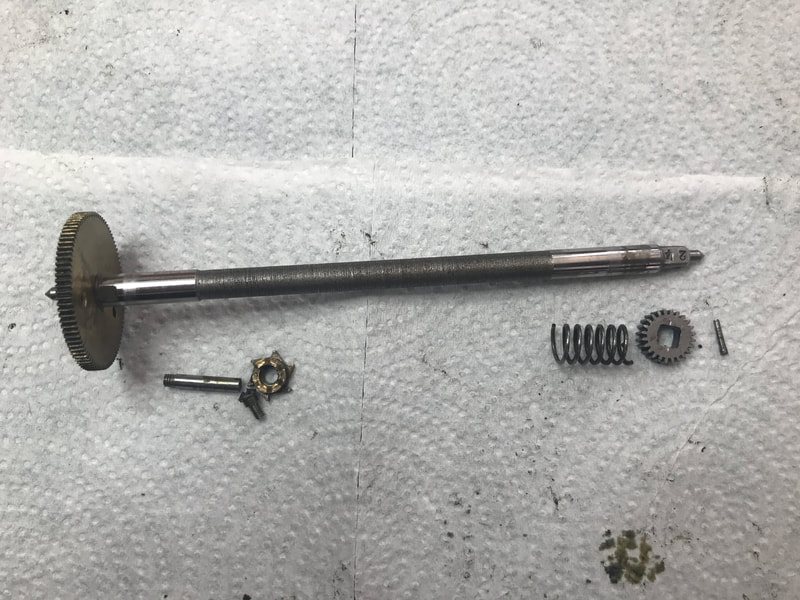
Support the cylinder assembly on its great wheel end by using a piece of wood with a hole drilled in it to take the short arbor.
Remove the tapered pin from the drive gear end.
If the gear will not slide off you may need to use a "Two Grasping Rama' device to pull it off. See Tools and photo below for details.
With the gear and spring removed the great wheel and shaft can be drawn out of the cylinder and the cylinder set aside for the moment. Remove the snail cam and drive pin from the inside of the great wheel, taking note of the screw.
DO NOT disturb the cam pin on the end of the cylinder
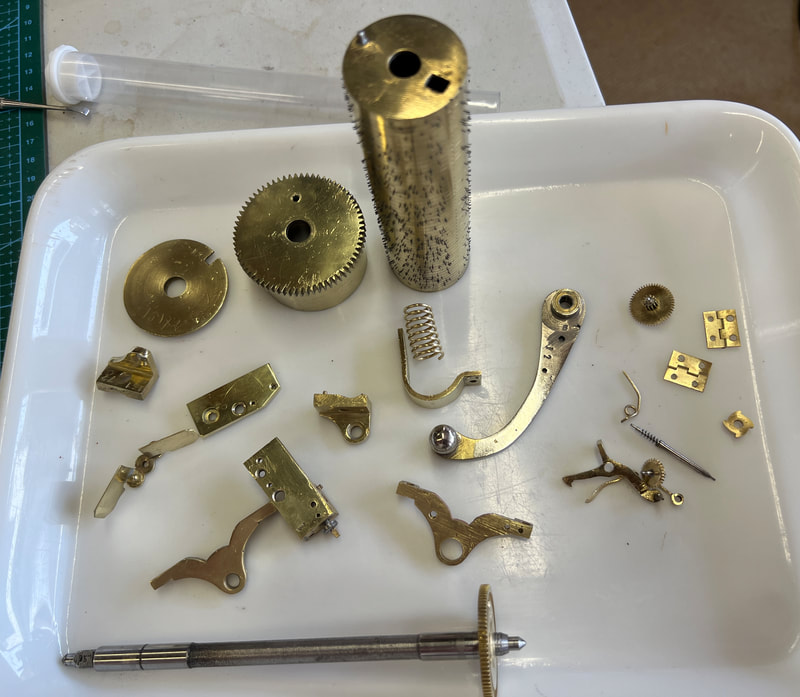
Now that you have completely dismantled the movement down to its individual components you can set about cleaning.
Please ensure that you read and comply with any warnings or instructions in respect of the safe handling of chemical solutions.
Please ensure that you read and comply with any warnings or instructions in respect of the safe handling of chemical solutions.
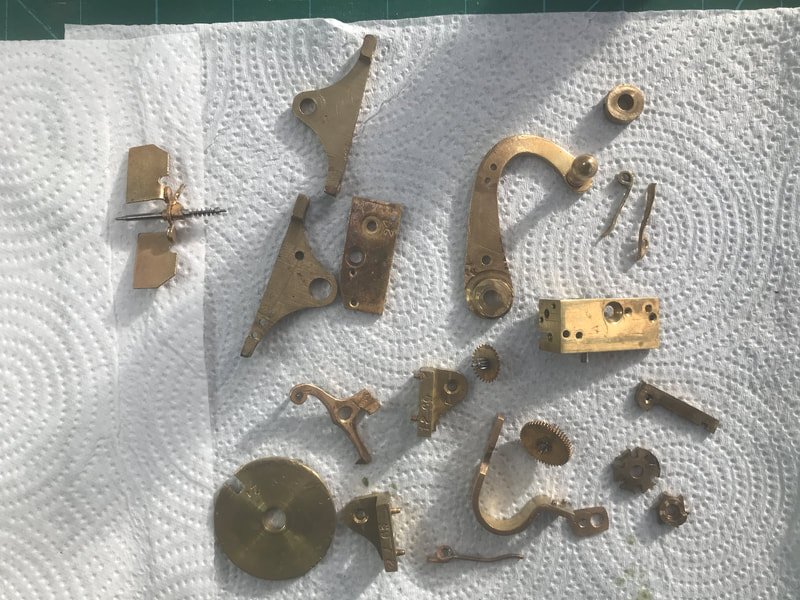
Cleaning the Brass
Cleaning the mechanism may take several forms depending on the material and how dirty it is.
Firstly I strip it down to the individual components.
I don't always remove the spring from the motor case unless it's necessary but now that I have a spring remover/replacer I'm more likely to remove, clean, oil and replace it.
I sometimes use an ultrasonic bath filled with warm water to which a degreaser has been added to begin the process for the smaller components. This literally 'shakes' off the muck.
If the parts are very oily I then may use WD40 degreaser to completely degrease them.
To remove the tarnish from brass I immerse the smaller parts in Horolene for 12 hours (overnight), then rinse under a tap. Be careful not to lose any small components down the drain. Dry using paper towels.
Now move on to Wrights Brass Polish.
Don your vinyl gloves, face mask and eye protection as this contains ammonia. I've found it useful to decant some polish into a smaller container with a screw on lid. Make sure you label the container.
Put all the component onto a plastic tray and use a Soft Micro Nano Toothbrush (see Tools below) to apply the polish. Rub the polish onto all surfaces of all components. It's not important to polish the underside of bearings and the Governor.
When all components have been polished, rinse under the tap and dry with paper towels.
0000 grade steel wool can be useful to bring a lustre back to metal, especially brass, and a glass fibre pen is great for getting into awkward places.
When it's all done I polish all large brass components with Autosol which contains a wax that inhibits tarnish.
It is essential to wear cotton gloves after polishing or the oil from fingers will cause tarnish very quickly.
Cleaning the Cylinder
Once the smaller brass components have been polished I turn my attention to the cylinder.
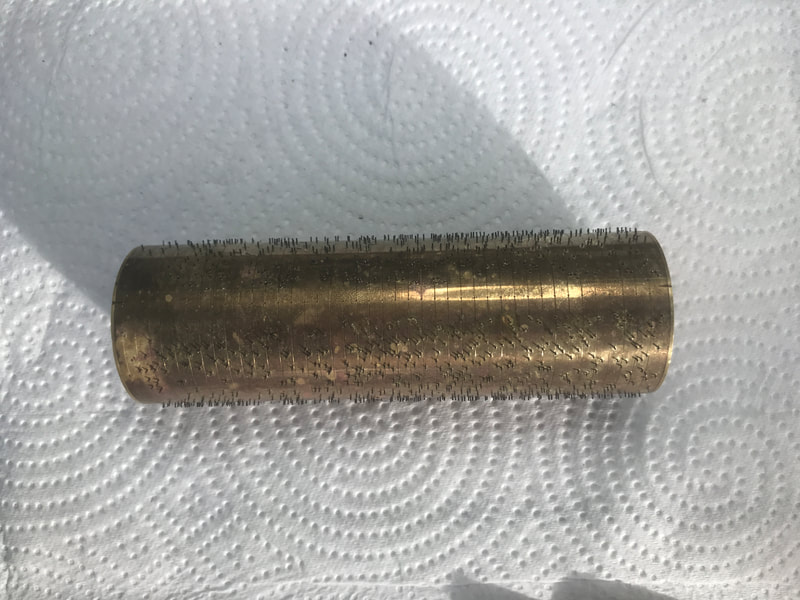
Firstly, it is very important that no cleaning fluids enter the inside of the cylinder as this will have an adverse effect upon the cement that holds the pins in place. In the worst case moisture will cause the pins to corrode and fall off.
Plug the holes with blue tac or cover them with tape that will remain when wet.
You CAN'T soak the cylinder in Horolene, so you have to start with Wrights Brass Polish.
Don your vinyl gloves, face mask & eye protection as this contains ammonia. I've found it useful to decant some polish into a smaller container with a sore on lid.
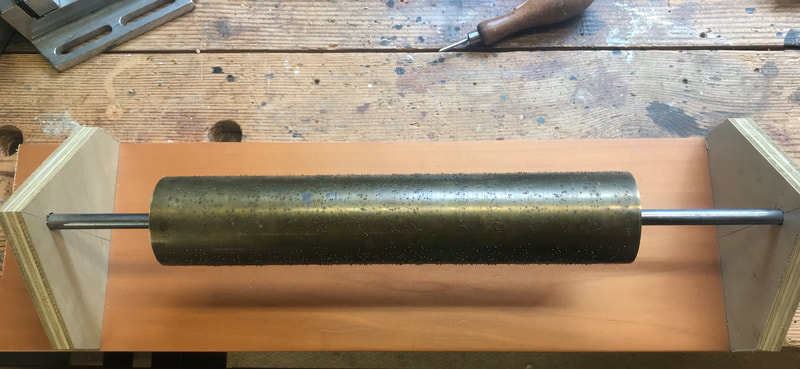
Small cylinders can be held in one hand while you brush with the other. For larger cylinders, I made up a jig to support it. This is also useful for pin straightening. See photo below.
Use a Soft Micro Nano Toothbrush. (see Tools below) and gently scrub with the polish in all directions, working in sections. Take care not to knock any of the pins and take particular care where the pins are very close together to make sure you get to the brass surface. Once satisfied that the surface is as clean as possible, rinse the cylinder carefully with water. You may need the brush to ensure that all the polish has gone from between crowded clusters of pins. Then dry the cylinder with paper towels.
Straightening the Pins
Some pins may have broken off or been bent. I don't have the skills or equipment to replace broken pins, but I do straighten the bent ones so that the tunes play as correctly as possible. Special magnifying glasses and pin straightening tools are required for this delicate task. If the pins are badly bent, one or two may break off. It's OK to lose between 5% and 10% without really affecting the tune, but only if they are scattered. If they are all in one place the cylinder will require professional re-pinning.
Final Polishing
When satisfied that all the pins are straight vertically and horizontally, you can move on to final polishing using Autosol.
Using the same type of toothbrush, gently rub small amounts of the cream onto the surface taking great care not to knock any pins.
Leave to dry for a while and then buff using a horsehair brush with longish pile. I have one brush to start the process and another to create the final lustre. Some people us a power buffing wheel for this process, but this must have a brush buffer, not a pad type as this will catch in the pins and cause damage..
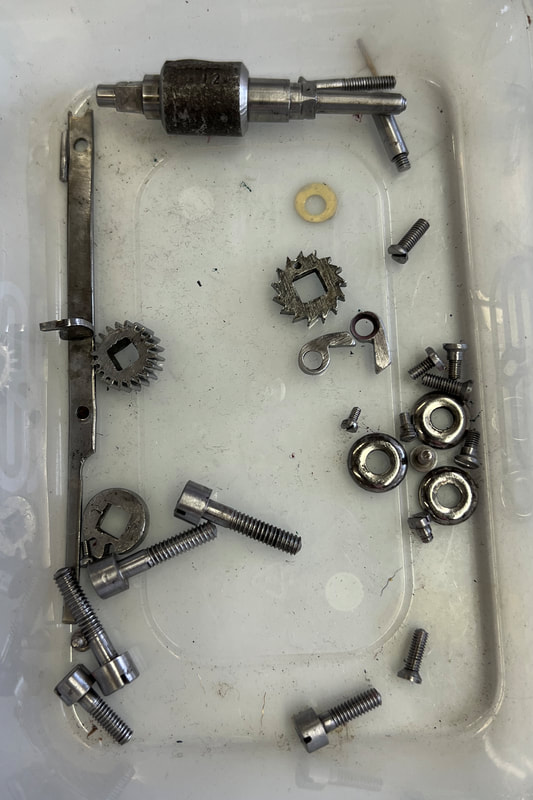
Cleaning the Steel (not the comb)
All of the remaining components are made of steel.
For really bad rust and corrosion I use Evaporust to 'eat' the rust.
Then use a small rotary wire brush in a Dremel mounted in a drill stand, but great care must be taken, not to lose any small screws which may get 'plucked' from your fingers.
I sometimes use an ultrasonic bath filled with warm water to which a degreaser has been added. This literally 'shakes' off the muck.
If it's very oily I then may use WD40 degreaser to completely degrease the parts. Sometimes I need to use a dentist pick to remove grease from the individual teeth of the gears. A small wire brush can also be useful here.
Using the Dremel, set in a bench stand, with an abrasive pad, polish all surfaces of the steel.
This includes the screw threads and their threads. If the slot in a screw head is really mucky, uses a wire wheel in the Dremel or use a dental tool or fine wire brush in the Dremel to clean it out.
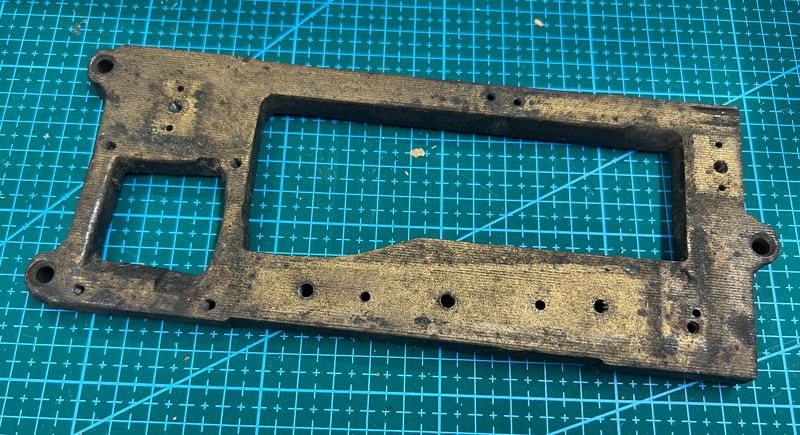
The Bedplate
There are two types of bedplate. Brass or Cast Iron
For the brass type, use the Wrights Brass Polish and Autosol as described above.
For the Cast Iron type degrease using WD40 degreaser, using a stiff wire brush to remove all of the grease and then rinse under running water.
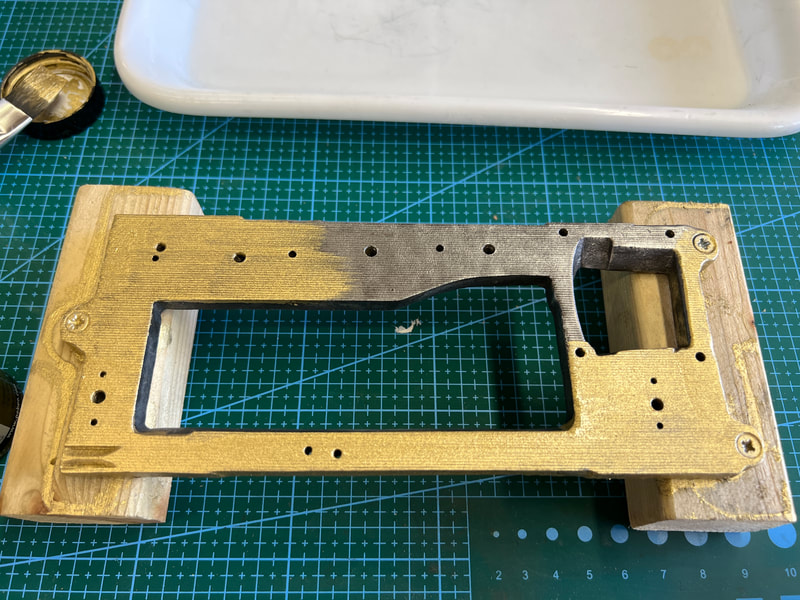
The bedplate will have originally been painted so it needs to be repainted using an antique gold paint. Choose your colour carefully. Two coats should be sufficient.
The Comb
Great care needs to be taken when cleaning up the comb so as not to dislodge any dampers, in fact I tend not to clean the underside.
If the top is rusty, place a sheet of finest grit emery paper laid flat onto a piece of glass, so that it's perfectly flat.
With the comb face down, fashion a wedge shaped piece of wood to fit between the weights and damper line and the comb base on which to apply pressure vertically. Then, moving back and forth in the direction of the teeth, gently abrade the teeth just enough to remove the rust and no more. Removing metal from teeth changes the tuning of the tooth.
If the comb has missing tips, teeth, lead weights or dampers, repairing should be left to a professional.
You can find a list on my Links page.
I don't mend combs, but I do have them repaired by a professional. It is well worth the expense if there are not too many teeth or tips missing.
Reassembly
Begin by reassembling the main components as described in the first paragraph above, but in reverse order.
Bedplate - now painted and dry
Cylinder
Spring Motor
Governor
Comb (Always last)
Begin by reassembling the main components as described in the first paragraph above, but in reverse order.
Bedplate - now painted and dry
Cylinder
Spring Motor
Governor
Comb (Always last)
Cylinder
Replace the snail cam and drive pin and ensure that the snail rotates freely. A tiny drop of clock oil can be added to the flange if necessary.
Reinsert the arbour through the cylinder and engage the drive pin.
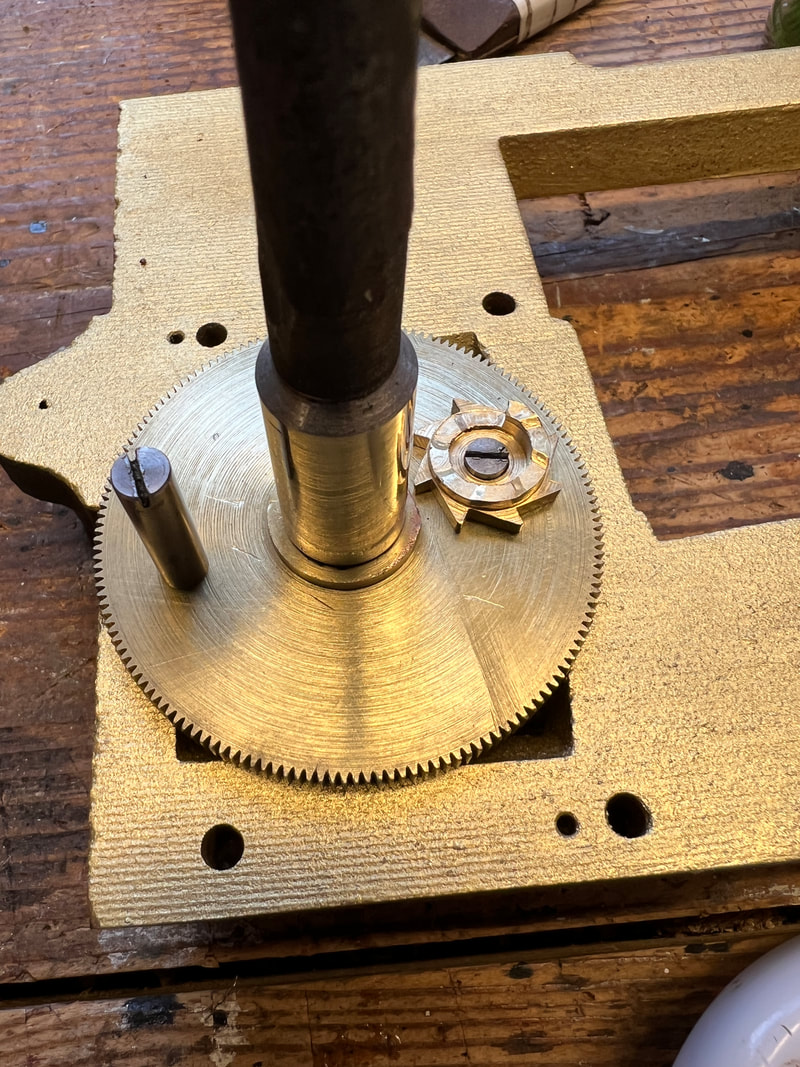
Stand the cylinder on the Great wheel using the block of wood with the hole drilled for the arbor end as used in disassembly.
Slip the cylinder return spring over the end of the arbor followed by the drive gear and secure with the tapered pin. It is sometimes necessary to replace the pin if it is bent or damaged.
Put a drop of clock oil onto both ends of the arbor and slip the correct bearing on.
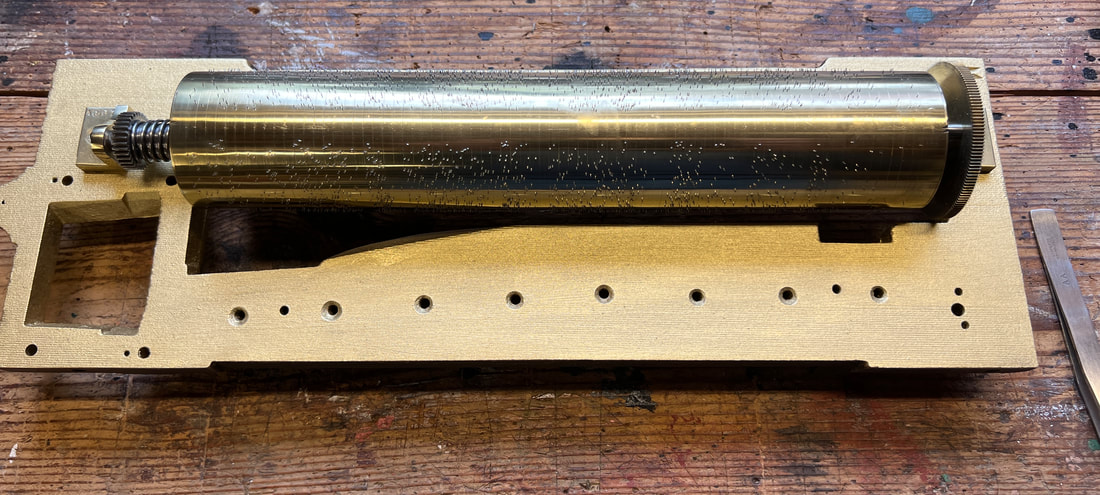
Reunite the assembly with the bedplate and screw down with the original screws.
Ensure that the cylinder rotates freely and doesn't bind in any way.
Sometimes it may be necessary to insert a thin sliver of paper under one side of a bearing to ensure no friction rotation.
Spring Motor
Re-install the spring into the casing. If you don't have a device like the one below, you will need to do this by hand.
Put the casing, open side up, into the wood jawed vice and do it up tightly. Make sure there is plenty of room all around the vice for you to work. Don your leather gloves and eye protection.
Taking the outer end of the spring, force it into the casing so that it engages with the case spring hook, then continue to feed the spring into the casing, rotating clockwise, until it's all in. This may take some considerable force. Take your time and don't let go of the spring.
Once the spring is in the casing, apply Horoglide clock spring grease to the surfaces of the spring. This will dissipate in-between the layers when the spring is tensioned later.
Insert the arbor into the centre and engage the spring hook.
Take the cover plate and slip it over the arbor, ensuring that the notch lines up with the mark on the outside of the casing. This might be two lines or a single dot.
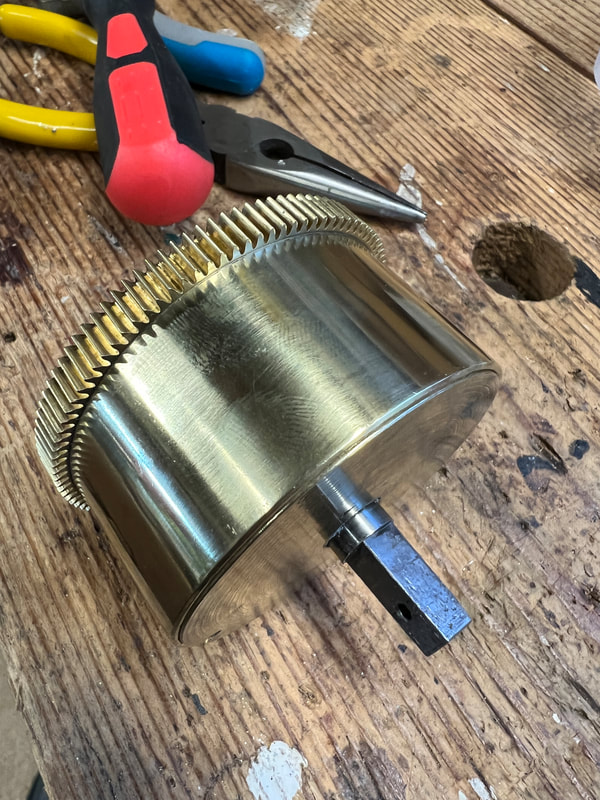
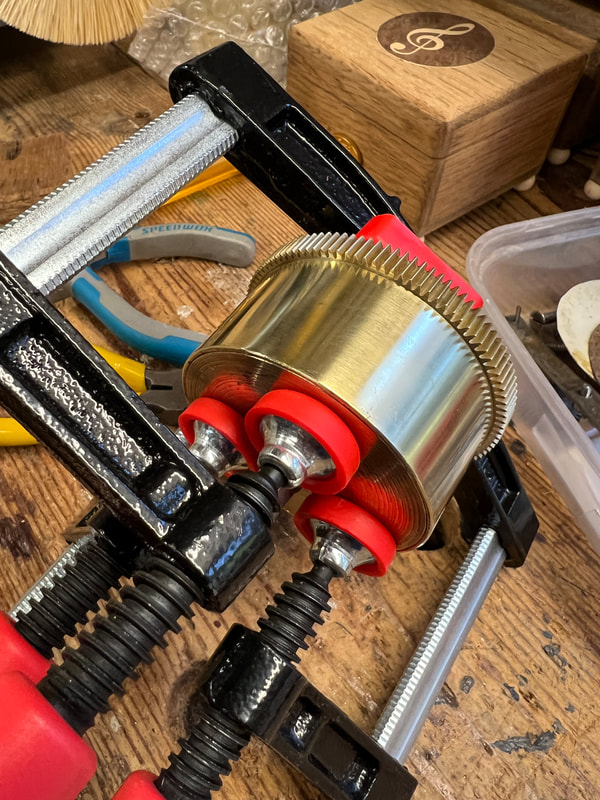
Press the cover into the flange. If it is very tight remove the assembly from the vice. Protecting the brass with thin pieces of wood, use several clamps to gently and evenly press the cover into place. ON NO ACCOUNT use a hammer.
Replace pawls and their springs, one to the winding lever, the other to the outer bearing and slip the bearing over the main spring arbor. Follow this with the arbor ratchet and finally the winding lever. Some mechanisms also have a winding lever bush.
Secure with the tapered pin.
Check that the ratchets both work.
Put a drop of oil on both ends of the arbor and slip the inner bearing over the end.
Reattach the spring motor assembly to the bedplate and check that it rotates freely when coupled to the cylinder drive gear.
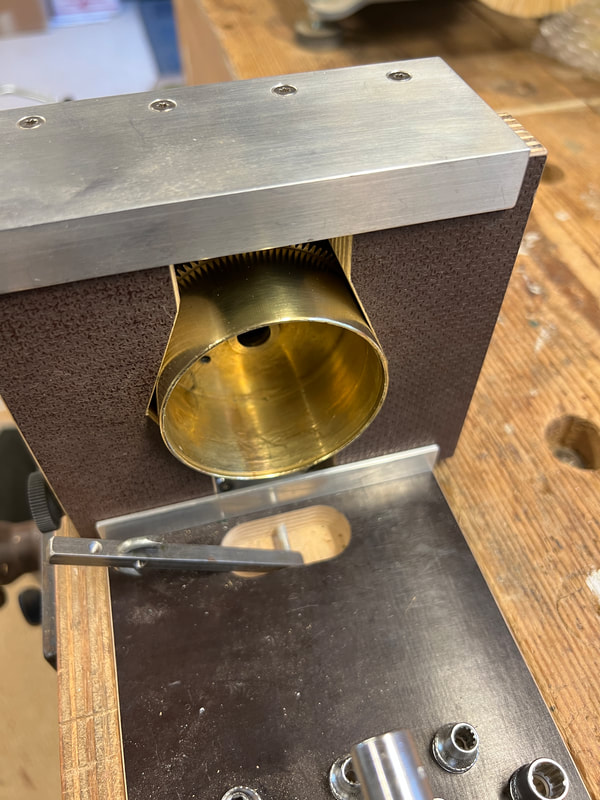
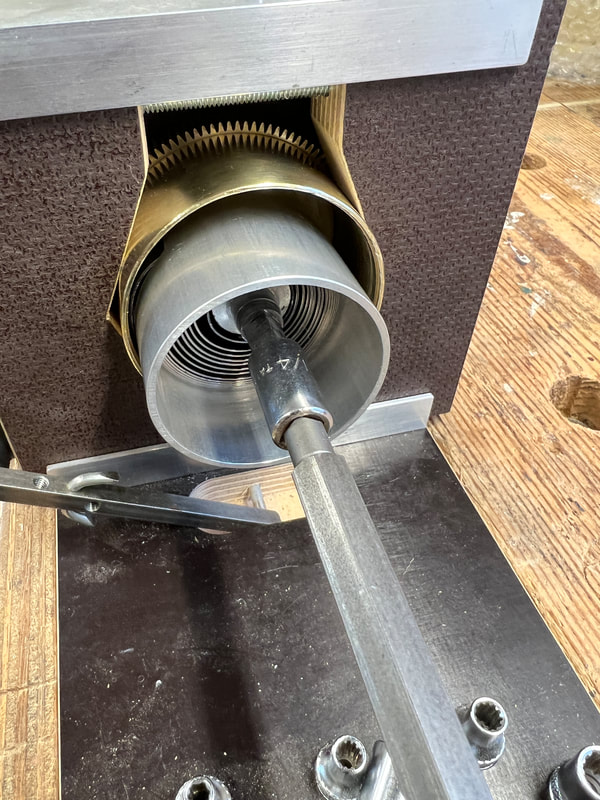
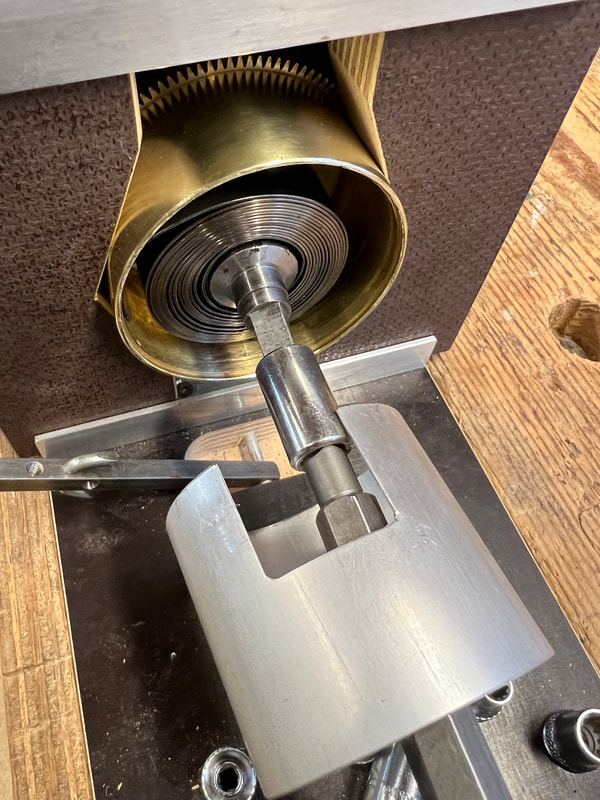
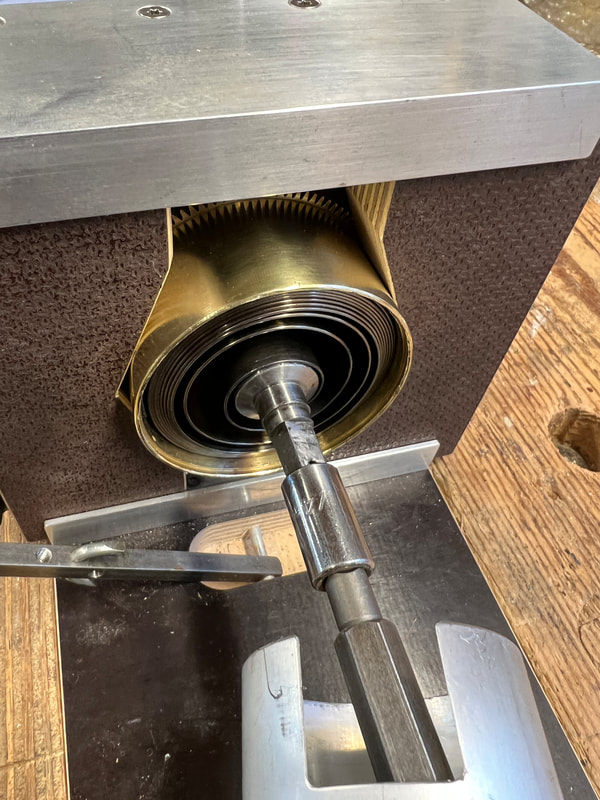
Below are a sequence of photos showing a spring being replaced into the casing using the specialist jig.
Note: The casing is used reversed as a bearing for the arbour when tensioning it.
When the spring is tensioned and sleeved the casing is turned around for the spring to be reinserted.
Note: The casing is used reversed as a bearing for the arbour when tensioning it.
When the spring is tensioned and sleeved the casing is turned around for the spring to be reinserted.
A different set of images showing the process in less detail, but with more of the end result with the spring motor complete and reattached to the bedplate.
I don't have enough hands to take photos while removing or replacing a spring by hand.
Governor
Refer to your original photos.
Lay the main governor gear housing on its side and put a small drop of clock oil in both bearing holes.
Drop the two gear cogs into place then put a drop of oil on the ends and align the cover. Secure with its screw.
If you have disassembled the endless, reassemble it. Oil the bottom pivot and position it into the bottom bearing.
Oil the top pivot and carefully replace the governor bracket aligning the pivot as you go. Secure with its screw.
Replace the jewel bearing with its retaining plate and screw.
Check that the endless will rotate freely by pushing upwards on the first gear that protrudes from the assembly.
If it does rotate freely, add the stop arm spring and set it aside. At this stage DO NOT refit the stop arm.
Carefully align the primary gear with the great wheel and press the governor assembly into position, insert the retaining screw and tighten.
Coming soon - photos of the governor being reassembled.
Final assembly and testing
Pull on the winding lever once or twice.
If all is well the endless will begin the rotate and so will the cylinder.
Once you are happy that all is working, add the stop/start lever to the side of the governor and allow the mechanism to run right down so that the male Geneva Stop is pointing upwards beside the spring casing.
From your notes made when removing the Geneva Stop, tension the spring so that the female Geneva Stop can be replaced. You may need to work out which side of the male this need to be so that the spring is stopped while still under tension.
Test until your are satisfied that all is well and allow the cylinder to come to rest at the tune gap.
Position the comb using its alignment pins and loosely replace all the screws. If they are marked, usually with punched dots, the lowest mark will be on the left. When all are in place tighten every other one a little, then go back and do the same for the remainder.
Then start at one end and tighten each screw.
Now it's time to play a tune. Make sure that the snail cam is in the correct place and then operate the stop/start lever by hand.
If all is well, wait until the tune stops and replace the tune change lever. Test again to see whether the tunes change OK.
You can now reunite the mechanism with the box.
Tools and Materials
Here is a list of tools and materials that may be of use when dismantling, cleaning, polishing and reassembling the movement:
Assorted size trays to protect work surfaces from chemicals and contain components
Set of flat head screwdrivers - Always use the correct size for the screw you are trying to remove/replace to prevent burring
Small Hammer
Fine nose pliers (various)
Tweezers (various)
Wire cutters
Two Grasping Rama (see below)
Dental pick(s)
Glassfibre pen
0000 grade steel wool
Magnifying glasses
Pin straighteners
Soft micro Nano Toothbrushes (set of ten from Amazon)
Plastic Takeaway trays and lids
Disposable Vinyl Gloves
Face Mask
Goggles or overclasses
White cotton gloves
Apron
Leather Gardening Gloves
Horolene
Wrights Brass Polish
Autosol
Horsehair brushes - various sizes
Microfibre polishing cloths
Precision Oiler
Scrap wood
Dremel drill with various abrasive discs and brushes
Dremel polishing wheels
Dremel drill stand
Drill bits
Restoring the Box
Some of the boxes require sensitive antique furniture restoration skills, including removal of old finishes, dismantling joints, regaling using traditional glues and techniques and of course refinishing, polishing and waxing. I attended a Course in late 2021 to learn these skills from an expert, Peter Thompson, aided by his wife Josie. I highly recommend Peter's courses.
Please see my other Tips and Tricks page on how to Restore a Music Box Case
Please see my other Tips and Tricks page on how to Restore a Music Box Case
